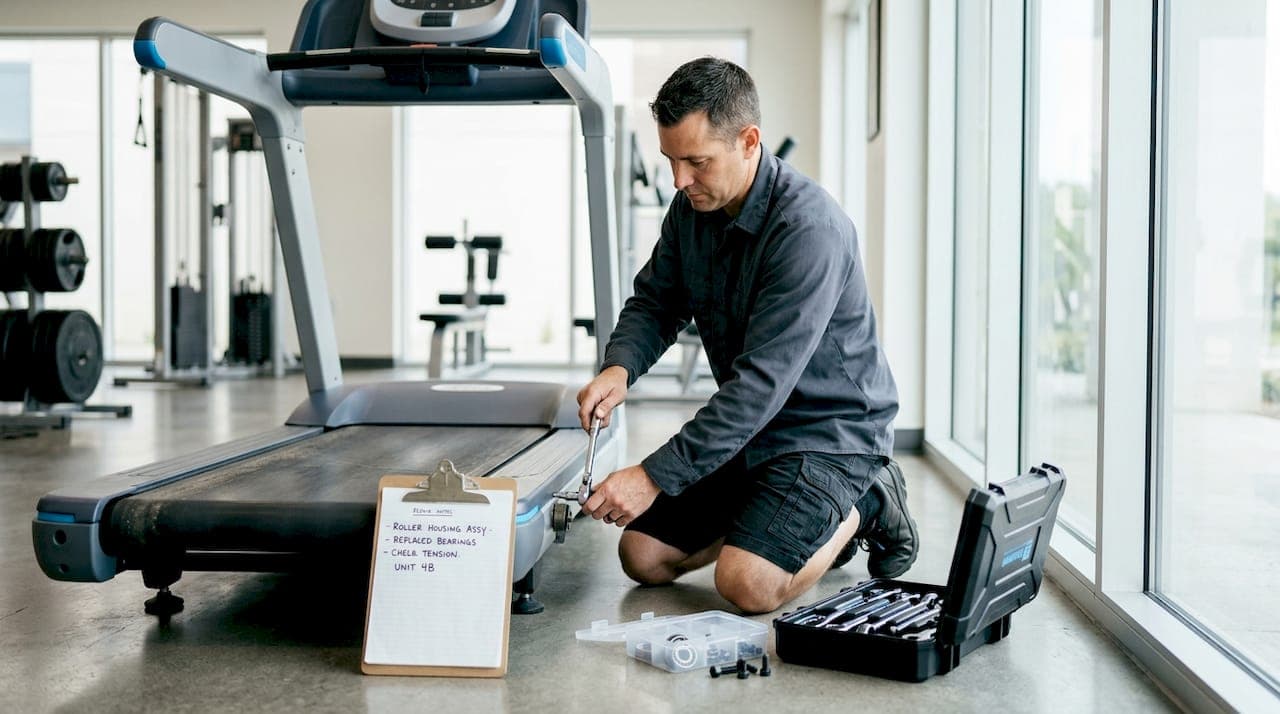
When a treadmill in your facility keeps slipping belts or grinding through every session, most technicians reach for the lubricant or tighten the tension bolts. That fixes the problem maybe once. Commercial treadmill roller replacement explained properly, though, reveals a different reality: worn rollers are often the root cause, and no amount of belt adjustment will compensate for a roller with flat spots or failed bearings. This guide walks you through how to identify the real problem, execute the replacement correctly, and choose parts that actually hold up under commercial load.
Table of Contents
- Key takeaways
- Commercial treadmill roller replacement explained: knowing when to act
- Step-by-step roller replacement workflow
- Choosing the right rollers and bearings
- Common pitfalls and how to avoid them
- My take on roller replacement in commercial settings
- Get professional roller replacement support
- FAQ
Key takeaways
| Point | Details |
|---|---|
| Recognize roller failure early | Flat spots, persistent noise, and belt slippage after tension adjustment all signal roller replacement is needed. |
| Follow a structured replacement process | Disconnecting power, loosening belt tension, and testing across speeds prevents repeat failures. |
| Match bearings to commercial load ratings | Sealed bearings with correct radial load and speed ratings outlast generic options in high-use environments. |
| Alignment is non-negotiable | Skipping belt tracking checks after roller installation causes recurring noise and premature wear. |
| Document every maintenance event | A written workflow reduces downtime and keeps multi-technician teams consistent on replacement standards. |
Commercial treadmill roller replacement explained: knowing when to act
The single biggest mistake in commercial treadmill maintenance is treating roller problems as belt problems. They share symptoms, but the causes are different, and the fixes are not interchangeable.
Roller wear is a primary trigger for replacement rather than a reason to keep troubleshooting symptoms. That means your decision tree should start with a physical inspection of the roller surface before you touch the belt tension bolts. Run your fingers along the roller. Any flat spot, crack, or chip you can feel is a red flag. Visually, look for discoloration from heat buildup, which signals bearing friction that has been building for weeks.
Noise is the other major indicator. Squeaking or grinding that persists after cleaning and lubrication almost always points to worn rollers or failing bearings rather than a surface issue. If you have already cleaned the deck, re-lubricated the belt, and the noise returned within a week, stop repeating the same fix.
Belt slippage is trickier because it overlaps with tension problems. The distinguishing factor is what happens after you re-tension. If the belt slips again within a few sessions, the roller surface no longer has the grip profile to hold tension consistently. That is a roller problem, not a tension problem.
On bearing health specifically: spin the roller by hand with the belt removed. It should rotate smoothly with almost no resistance. Any roughness, wobble, or grinding sensation under your hand means the bearing is failing. Commercial treadmill rollers typically last several years, but heavy usage and humid environments shorten that lifespan considerably. A gym running machines 12 or more hours a day in South Texas heat is not operating under the same conditions as a light-use hotel fitness center.
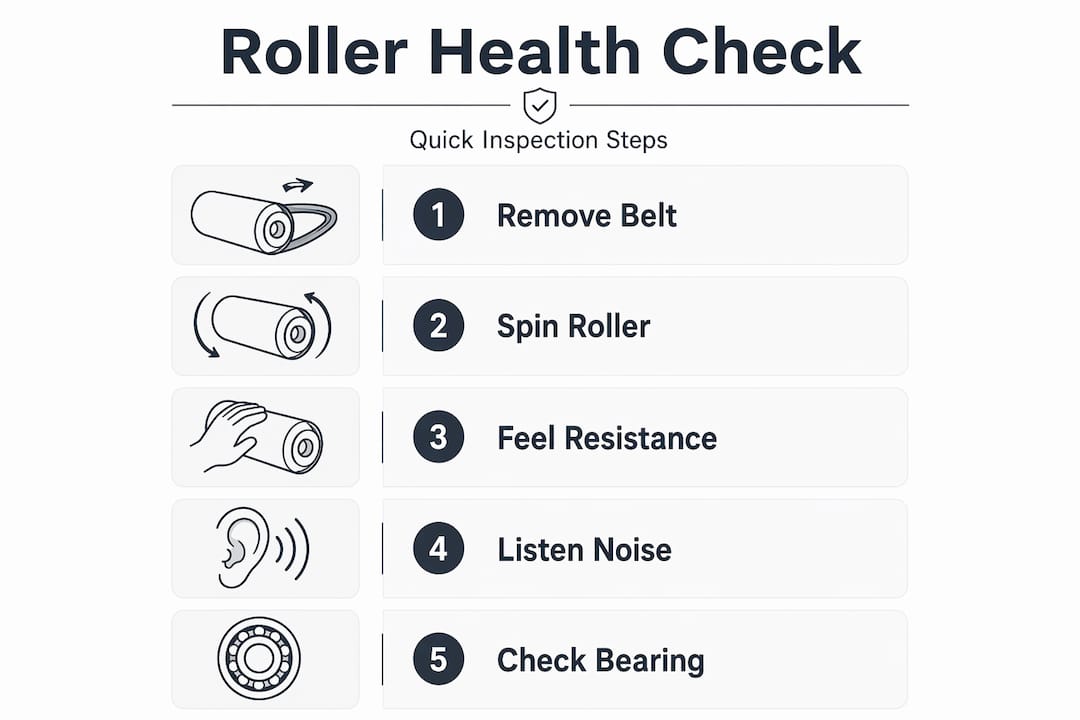
Pro Tip: Before concluding a roller needs replacement, run through lower-effort fixes first: clean the belt and deck, check lubrication, and adjust tension. Replacement should follow only after those steps have failed to resolve the symptom.
Step-by-step roller replacement workflow
A clean, repeatable process is what separates a repair that lasts from one that brings the machine back to your bench in three weeks. Here is the workflow used by experienced technicians for both front and rear roller replacement on commercial units.
-
Disconnect power completely. Unplug the treadmill from the wall and remove the safety key. Do not rely on the power switch alone. For electrical safety during servicing, full disconnection is the standard.
-
Remove the motor cover and side panels. Follow the manufacturer's service manual for your specific model. Forcing panels can crack mounting tabs that are expensive to replace. Keep all hardware in a labeled container.
-
Loosen the belt tension bolts. Both rear roller adjustment bolts need to be backed out evenly. This releases belt tension so you can slide the roller out without fighting the belt. Mark the current bolt positions with a marker before loosening so you have a reference point for re-tensioning.
-
Remove the old rollers and bearings. Slide the roller out from its mounting brackets. Bearings are press-fit into the roller ends, and bearing removal requires specialized tools like a bearing puller and press. Trying to knock bearings out with a punch and hammer risks damaging the roller bore and the new bearing seat.
-
Install new bearings and rollers. Press the new bearings in squarely using a bearing press. Misaligned press-fitting is one of the most common causes of premature bearing failure after a replacement. Seat the roller back into the mounting brackets and confirm it spins freely.
-
Reassemble panels and re-tension the belt. Bring the tension bolts back to your marked reference position, then fine-tune. The belt should deflect about half an inch under moderate finger pressure at the center. Reinstall all covers.
-
Test across multiple speeds. Run the treadmill at low, mid, and high speeds for at least three minutes each. Listen for noise, watch for belt tracking drift, and feel for vibration through the frame. Any deviation means something needs adjustment before the machine goes back into service.
Pro Tip: Take a photo of the belt tracking position and tension bolt depth before disassembly. It gives you a reliable starting point during reassembly and cuts troubleshooting time significantly if something feels off after the replacement.
Choosing the right rollers and bearings
Parts selection is where many in-house maintenance programs cut corners, and it shows up six months later as a repeat repair. Here is what actually matters when sourcing replacement rollers and bearings for commercial treadmills.
Matching specs to your machine
Start with the treadmill's service manual or the OEM parts catalog. You need the roller diameter, shaft diameter, and bearing designation (usually a number like 6203 or 6205). Using an undersized roller changes belt geometry and causes tracking problems immediately. Using a bearing with a lower load rating than the original shortens its service life under commercial use.

Bearings must handle both radial and axial loads at the rotational speeds your treadmill operates. A bearing rated for light-duty cycling equipment is not an acceptable substitute for one rated for a commercial treadmill running at 12 mph for hours at a time.
Bearing type comparison
| Bearing type | Best for | Key advantage | Limitation |
|---|---|---|---|
| Sealed deep groove ball | Most commercial treadmills | Low maintenance, moisture resistant | Not field-serviceable |
| Open ball bearing | Low-humidity, controlled environments | Lower cost, re-greaseable | Requires more frequent maintenance |
| Shielded ball bearing | Moderate-use facilities | Partial contamination protection | Less effective in humid climates |
| Cartridge bearing | High-load commercial units | Easy swap, consistent fit | Higher upfront cost |
For gyms in humid climates, sealed bearings are the clear choice. They resist moisture ingress that would corrode an open bearing within months. The upfront cost difference between sealed and open bearings is minor compared to the labor cost of a repeat replacement.
Pro Tip: When sourcing best treadmill rollers for commercial use, prioritize OEM or OEM-equivalent parts over generic aftermarket rollers. The diameter tolerances on cheap aftermarket rollers are often loose enough to cause belt tracking issues right out of the box.
Common pitfalls and how to avoid them
Even experienced technicians run into the same traps during roller replacement. Most post-replacement failures trace back to one of these five issues.
-
Skipping belt re-tensioning after roller swap. This is the most common cause of repeat service calls. Improper belt tension after roller replacement causes recurring slippage and accelerates wear on the new roller surface. Always re-tension from a known reference point.
-
Ignoring belt tracking after reassembly. A belt that runs even slightly off-center will wear the roller unevenly and can damage the belt edge within weeks. Tracking adjustment is not optional. It takes five minutes and saves a belt replacement.
-
Skipping bearing housing cleaning. Old grease, debris, and corrosion in the bearing housing will contaminate a new bearing immediately. Clean the housing with a lint-free cloth and solvent before pressing in the new bearing.
-
Pressing bearings in at an angle. A cocked bearing will fail faster than the original worn one. Use a proper press and a flat driver that contacts the outer race evenly.
-
Not running a full post-replacement test. Walking the machine through a brief test at low speed is not enough. Run it at the speeds your members actually use. Noise and vibration problems often only appear at higher RPM.
A documented preventative maintenance workflow is what keeps these mistakes from becoming habits. When every technician follows the same checklist, the error rate drops and post-repair callbacks become rare. For facilities managing multiple machines, a simple log tracking roller replacement dates, bearing part numbers, and post-service test results pays for itself quickly.
My take on roller replacement in commercial settings
I have seen facilities spend thousands on new treadmill belts when the real problem was a $40 bearing that nobody bothered to inspect. The symptom overlap between belt wear and roller wear is real, and it costs money when you misread it.
What I have found consistently is that the technicians who get the best outcomes are not the ones with the most tools. They are the ones who follow a symptom-based decision process before touching anything. They clean first, adjust tension, and only move to roller replacement after those steps have failed. That discipline alone eliminates a significant percentage of unnecessary parts swaps.
The alignment step is the one I see skipped most often, even by experienced people. After a roller swap, belt tracking can shift by just a few millimeters and nobody notices until the belt starts fraying at the edge two months later. That is an expensive lesson when you are managing a facility with ten machines.
I am also a believer in spending more on bearings. The cost difference between a quality sealed bearing and a generic one is often less than $10 per roller. The labor cost of a repeat replacement is not. Over a fleet of machines, that math becomes obvious fast.
Finally, there is real value in knowing when to call a professional. Some bearing press jobs on tight-tolerance commercial rollers require equipment and experience that goes beyond a standard maintenance toolkit. Trying to force it without the right tools risks damaging the roller bore and turning a $40 repair into a $200 one. Knowing that line is part of being a good technician.
— Myles
Get professional roller replacement support
If your facility's treadmills are showing signs of roller wear and you want the job done right the first time, Texastreadmillrepair is built for exactly this kind of work.

Texastreadmillrepair sends certified technicians directly to your gym, no transportation required. Their flat-rate pricing means you know the cost before the work starts, and every repair comes with a 90-day warranty on parts and labor. For commercial facilities in South Texas managing multiple machines, their treadmill repair services cover everything from roller and bearing replacement to belt, motor, and console repairs. Same-week appointments are available, so a worn roller does not have to mean days of downtime. Reach out to Texastreadmillrepair to schedule an assessment or set up a recurring maintenance visit in Mission TX and keep your equipment running at full capacity.
FAQ
How do I know if my commercial treadmill rollers need replacement?
Physical signs like flat spots, cracks, or chips on the roller surface are the clearest indicators. Persistent noise after cleaning and lubrication, or belt slippage that returns after re-tensioning, also point to roller replacement rather than further adjustment.
What tools are needed to replace treadmill rollers?
Roller replacement requires standard hand tools for panel removal plus a bearing puller and press for bearing extraction and installation. Attempting to remove press-fit bearings without proper tools risks damaging the roller bore.
How long do commercial treadmill rollers last?
Commercial treadmill rollers typically last several years under normal use, but heavy daily usage and humid environments can shorten that lifespan significantly. Facilities running machines 10 or more hours per day should inspect rollers at least twice per year.
What type of bearing is best for commercial treadmill rollers?
Sealed deep groove ball bearings are the best choice for most commercial treadmills, particularly in humid environments. They resist moisture and contamination without requiring field maintenance, making them the most reliable option for high-use facilities.
Why does my treadmill belt keep slipping after roller replacement?
Belt slippage after roller replacement almost always traces back to improper re-tensioning or a tracking issue. Re-tension the belt using a reference point from before disassembly and check that the belt runs centered on the roller before returning the machine to service.